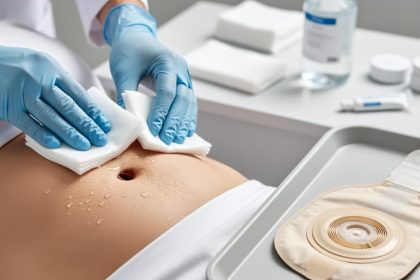
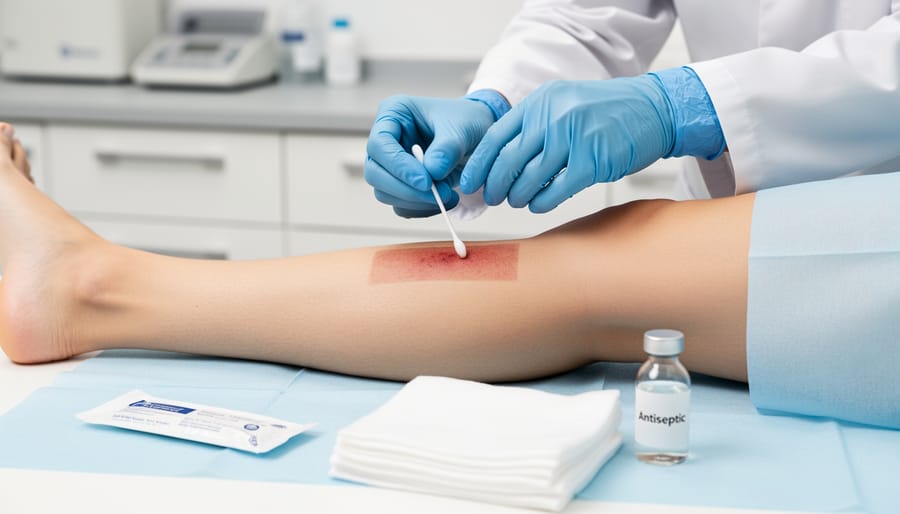
Collecting a wound swab culture requires sterile technique, proper timing, and precise collection from viable tissue to accurately identify pathogens and guide antibiotic therapy. The procedure takes approximately five minutes and involves cleaning the wound, selecting tissue from the wound bed rather than surface debris or necrotic material, and using a sterile swab in a rotating motion to capture adequate microbial samples. When performed correctly, this diagnostic tool helps clinicians differentiate between contamination, colonization, and true infection, reducing inappropriate antibiotic use and improving patient outcomes.
Healthcare professionals face a critical decision point before reaching for a culture swab. Not every wound requires culturing. Clinical signs of infection such as increased pain, purulent drainage, elevated temperature, or delayed healing should guide the decision to culture rather than routine sampling of all chronic wounds. Research continues to demonstrate that surface swabs, while convenient, carry inherent limitations in representing deep tissue infection, yet remain the most practical method in outpatient and long-term care settings where tissue biopsy proves impractical.
The accuracy of culture results depends heavily on collection technique. Common errors include sampling necrotic tissue, collecting from wound edges rather than the base, inadequate specimen volume, and delayed transport to the laboratory. Each of these compromises diagnostic value and may lead to misleading results that direct therapy away from the causative organisms. Understanding the distinction between proper and improper technique directly impacts clinical decision-making, appropriate antimicrobial stewardship, and ultimately wound healing progression. This guide provides evidence-based procedural steps reviewed by wound care specialists to ensure specimens yield clinically meaningful results.
When to Collect a Wound Culture Specimen
Not every wound requires a culture. The decision to collect a specimen depends on recognizing specific clinical indicators that suggest infection rather than simple colonization. Wounds naturally harbor bacteria, but only active infection warrants laboratory investigation and targeted treatment.
Collect a wound culture when you observe clear signs of infection beyond surface colonization:
- Increasing pain intensity that is new or disproportionate to the wound size
- Purulent drainage with thick, opaque, or discolored exudate
- Expanding erythema or warmth extending beyond the wound margins
- Delayed or stalled healing despite appropriate wound care
- Friable tissue that bleeds easily when touched
- Foul odor distinct from normal wound drainage
- Systemic signs including fever, elevated white blood cell count, or malaise
Certain wound types and clinical scenarios have lower thresholds for culture collection. Surgical site infections developing within 30 days post-operatively should be cultured to guide antibiotic therapy and monitor for resistant organisms. Chronic wounds that fail to progress after four weeks of standard treatment need culture assessment to rule out biofilm infections or atypical pathogens. Immunocompromised patients, including those with diabetes, peripheral vascular disease, or on immunosuppressive medications, warrant earlier culture intervention even with subtle infection signs.
Skip routine cultures in superficial wounds healing normally without inflammation or systemic symptoms. Surface swabs of dry eschar, stable scabs, or obviously necrotic tissue yield contaminated specimens that do not reflect true wound bed status. These situations require debridement before any meaningful culture can be obtained.
Clinical judgment remains paramount. A wound showing two or three infection indicators combined with risk factors like compromised perfusion or heavy bacterial burden justifies culture collection. Conversely, a single mild symptom in an otherwise healthy healing wound typically does not. When uncertain, err toward collecting the specimen since delayed diagnosis of true infection worsens patient outcomes more than unnecessary testing affects resource allocation.
Essential Materials and Equipment
Gathering the correct supplies before you begin ensures a sterile, efficient collection process and minimizes the risk of specimen contamination. Having everything at hand prevents interruptions that could compromise specimen integrity.
Culture Collection Supplies
Sterile culture swabs are your primary collection tool. Use swabs specifically designed for wound cultures, not general-purpose swabs. Aerobic swabs with transport medium preserve bacteria that grow in oxygen-rich environments and remain viable for 24-48 hours. For suspected deep tissue or anaerobic infections, obtain swabs with anaerobic transport medium that maintains oxygen-free conditions. Quality matters: choose rayon or polyester-tipped swabs rather than cotton, which can inhibit bacterial growth and interfere with laboratory analysis.
Transport medium tubes keep specimens viable until they reach the laboratory. These tubes contain gel or liquid that maintains bacterial viability and prevents drying. Check expiration dates before use, as expired medium compromises culture accuracy.
Personal Protective Equipment
Gloves are mandatory, sterile gloves are preferred for the actual swabbing procedure. Wear a disposable gown if wound drainage might contact your clothing. Eye protection and a mask protect against splash exposure during wound irrigation or when handling heavily draining wounds.
Wound Preparation Items
Sterile saline solution irrigates and cleanses the wound bed before specimen collection. Use 0.9% sodium chloride in single-use containers or ampules. Sterile gauze pads remove excess exudate and debris. Include a sterile drape to maintain a clean field around the wound site.
Documentation Materials
Pre-printed laboratory requisition forms capture patient information, wound location, collection date and time, and clinical indications. Specimen labels must include patient identifiers, collection site, date, time, and your initials. Keep a waterproof pen nearby for immediate labeling.
Safety Precautions and Contraindications
Before collecting a wound culture specimen, verify that standard infection control precautions are in place. Perform hand hygiene, don gloves (non-sterile are acceptable for most wound cultures), and assess whether additional personal protective equipment such as face shields or gowns are warranted based on the wound’s location and drainage level. Position the patient comfortably to maintain a stable field and minimize movement during specimen collection.
Certain wound conditions represent contraindications to swab culture collection. Dry eschar forms a protective barrier over healing tissue, and culturing its surface captures environmental contaminants rather than organisms causing active infection. Similarly, wounds requiring surgical or sharp debridement should undergo tissue removal before culture, since necrotic material harbors colonizing bacteria that do not reflect the true infection profile of viable tissue beneath.
Superficial colonization, where bacteria are present on the wound surface without clinical infection signs, does not warrant culture. All chronic wounds contain bacteria; their presence alone, without increased pain, expanding erythema, purulent exudate, or systemic symptoms, indicates colonization rather than infection. Culturing these wounds generates reports of multiple organisms that complicate treatment decisions without clinical benefit.
To prevent specimen contamination, avoid touching the swab tip to intact skin, wound edges, or any non-sterile surface before or after sampling. Never use the same swab for multiple wounds, as this creates cross-contamination risk and invalidates results. If the swab contacts an unintended surface during collection, discard it and begin with a fresh sterile swab. Maintain the sterile field throughout the procedure, and ensure transport media tubes are opened only immediately before swab insertion to preserve specimen integrity and prevent environmental contamination that compromises laboratory analysis.
Step-by-Step Wound Culture Collection Technique
Preparing the Wound Site
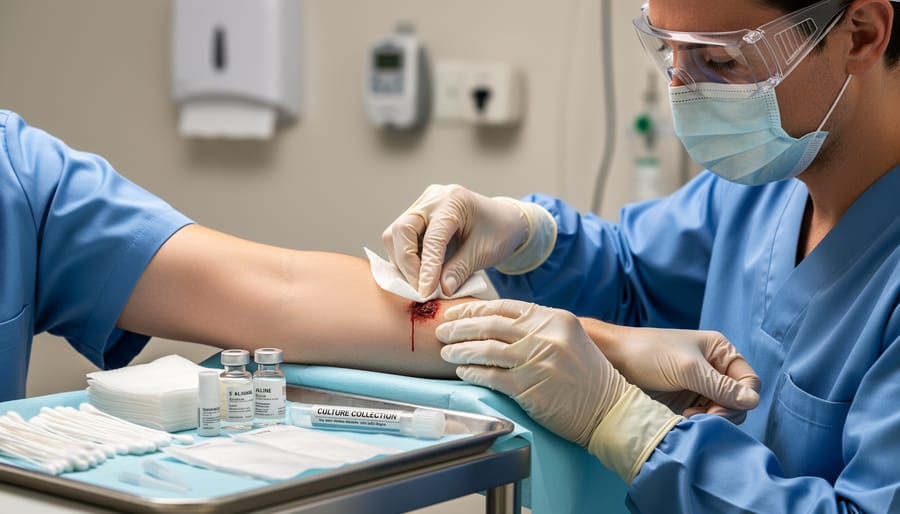
Proper wound preparation is critical, swabbing an unprepared wound captures surface contaminants rather than organisms causing the actual infection. Begin by assembling your supplies: sterile saline solution (0.9% sodium chloride), a 20-30 mL syringe with an 18-gauge needle or catheter for irrigation, sterile gauze pads, and clean gloves.
First, irrigate the wound thoroughly with sterile saline using moderate pressure to dislodge loose debris, devitalized tissue, and superficial exudate. Direct the stream across the wound bed at an angle, avoid forceful perpendicular spraying, which can drive bacteria deeper into tissue. Use at least 100-200 mL of saline for wounds larger than 2 cm in diameter, more for extensive or heavily contaminated wounds.
After irrigation, gently pat the wound bed with sterile gauze to absorb excess moisture and remaining surface discharge. Don’t scrub vigorously; you’re removing only the loose material, not disrupting viable tissue.
Now identify your culture site. Target the area of most active infection, typically where you observe the greatest inflammation, purulent drainage, or tissue damage. Avoid obvious necrotic tissue (black or gray eschar), as it yields unreliable results; if present, debridement should occur before culturing. Similarly, skip areas covered by thick biofilm or slough unless you can gently remove these layers first.
The goal is exposing viable wound tissue where active bacterial invasion occurs. A properly prepared site ensures your culture sample reflects the true pathogen burden, not just surface colonization.
The Levine Swabbing Method
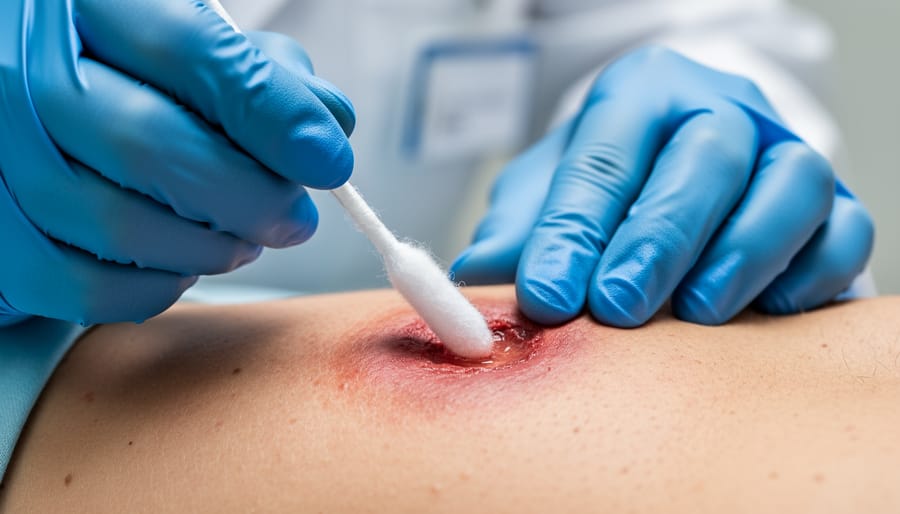
The Levine technique remains the gold standard for wound swab collection because it captures wound tissue fluid rather than surface contaminants. This method significantly improves diagnostic accuracy compared to simply wiping across the wound surface.
To perform the Levine technique correctly, identify the cleanest, most viable tissue area in the wound bed, typically near the wound edge where active infection is most likely present. Hold the sterile swab at approximately a 45-degree angle to the wound surface. Press the swab tip firmly enough to cause slight tissue compression and extract fluid from deeper tissue planes, but not so hard that you cause bleeding or patient discomfort.
Rotate the swab slowly and steadily over a 1 cm² area (roughly the size of a dime) for 5 seconds. The rotation should be continuous and deliberate, count “one-thousand-one, one-thousand-two” to ensure adequate duration. Apply consistent pressure throughout the rotation to maintain contact with the wound bed and adequately saturate the swab tip with wound fluid.
Avoid these critical errors: skimming the swab across the surface without pressure, sampling areas with visible pus or slough, moving too quickly through the rotation, or using a back-and-forth wiping motion instead of rotation. Each mistake reduces specimen quality and risks false-negative results or detection of colonizing bacteria rather than true pathogens.
If the wound is deep or has undermining, you may need to culture the deepest accessible area where active infection is suspected.
Specimen Handling and Transport
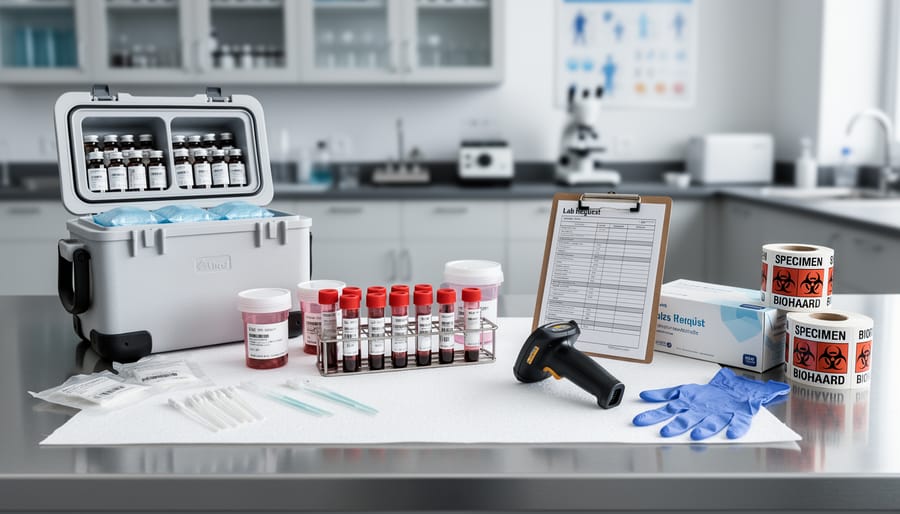
Once you’ve collected the specimen using the Levine technique, immediately insert the swab into its transport medium tube. Push the swab tip fully into the medium until it reaches the bottom, ensuring complete contact with the gel or liquid preservative. Avoid touching the swab tip to any external surface or allowing it to sit exposed to air, as this introduces contamination and allows organisms to die off.
Seal the transport tube securely according to the manufacturer’s instructions. Most systems require a firm twist or snap closure to maintain sterility and prevent leakage during transport.
Label the specimen container at the bedside, not before collection, to prevent mix-ups. Required information includes patient’s full name, date of birth, medical record number, collection date and time, wound location (be specific: “left heel” not just “foot”), and ordering provider’s name. Many facilities also require the collector’s initials. Use waterproof labels or permanent marker directly on the tube, never on the lid alone.
Document the collection time immediately. Specimens must reach the laboratory within two hours at room temperature, or within 24 hours if refrigerated at 2-8°C. Beyond these windows, bacterial populations shift dramatically, with fastidious organisms dying while hardy contaminants multiply, rendering results unreliable.
Store specimens upright in a refrigerator if transport will exceed two hours. Never freeze wound culture swabs. Keep specimens away from extreme heat or direct sunlight during transport. Include the completed requisition form with clinical information about suspected infection and any current antibiotic therapy, as this guides laboratory processing and interpretation.
Common Errors That Compromise Culture Results
Collecting a wound culture specimen seems straightforward, but several common errors can invalidate results and mislead treatment decisions. Understanding these mistakes helps healthcare professionals refine their technique and obtain cultures that accurately reflect the wound’s microbial status.
The most frequent error is sampling surface debris, slough, or purulent drainage rather than extracting fluid from viable wound tissue. Surface material contains colonizing bacteria and contaminants that don’t represent the infection causing delayed healing. This produces culture reports showing multiple organisms in mixed growth, clinically useless results that don’t guide antibiotic selection. The Levine technique specifically addresses this by applying rotational pressure to extract fluid from deeper tissue layers where true pathogens reside.
Inadequate wound cleansing before specimen collection introduces similar contamination. Skipping the irrigation step or using tap water instead of sterile saline leaves surface bacteria and debris that overwhelm the culture with irrelevant organisms. Healthcare professionals rushing through the procedure often omit this critical preparation, particularly in busy clinical settings.
Additional errors that compromise specimen integrity include:
- Delayed transport to the laboratory beyond two hours without refrigeration, allowing overgrowth of faster-replicating organisms that skew results
- Insufficient pressure during swabbing, failing to extract wound fluid and collecting only surface moisture
- Culturing dry necrotic tissue or eschar that harbors dead bacteria rather than active infection
- Using expired culture swabs or incorrect transport media that fail to preserve specimen viability
- Touching the swab tip to non-sterile surfaces before or after specimen collection
Another significant mistake involves collecting specimens from wounds without clinical infection signs. Culturing chronic wounds that show only colonization, not active infection, produces positive results that prompt unnecessary antibiotic therapy. This contributes to antimicrobial resistance without benefiting the patient. Always verify clinical indicators justify the culture before collecting the specimen.
Interpreting Results and Next Steps
Once you’ve submitted the specimen to the laboratory, successful collection hinges on proper documentation: note the collection date, time, exact wound location, clinical signs observed, and current antibiotic therapy on the requisition form. Review your documentation to confirm you followed the Levine technique and avoided common errors listed in the previous section. Incomplete or inaccurate information can delay processing or invalidate results.
Culture reports typically arrive in phases. Preliminary results showing bacterial growth appear within 24 to 48 hours and identify broad categories of organisms present. Final reports, including full organism identification and antibiotic sensitivity patterns, arrive within 48 to 72 hours for most bacteria. Anaerobic cultures and fungal cultures take longer, sometimes five to seven days, because these organisms grow more slowly.
The critical distinction is between colonization and true infection. Colonization means bacteria are present but not causing tissue damage or systemic response. The wound shows normal healing progression without increased inflammation. Infection involves tissue invasion with clinical signs: purulent exudate, expanding erythema, warmth, new or worsening pain, foul odor, and delayed healing. A culture showing heavy bacterial growth does not automatically indicate infection if clinical signs are absent. Conversely, if a patient shows clear infection signs, begin appropriate wound management even before final culture results arrive.
Use culture results to refine your treatment approach. If the report confirms infection, select antibiotics based on sensitivity patterns rather than broad-spectrum coverage. Adjust wound care protocols: increase cleansing frequency for infected wounds, consider antimicrobial dressings, reassess debridement needs, and address underlying factors that impair healing such as poor perfusion or uncontrolled diabetes. Document your clinical reasoning connecting culture findings to management changes. Schedule follow-up assessment within 48 to 72 hours after starting targeted therapy to verify wound improvement. If the wound does not respond despite appropriate antibiotic coverage, consider repeat culture or referral to wound care specialists, as resistant organisms or deeper infection may be present.
Frequently Asked Questions About Wound Swab Cultures
Are swab cultures as accurate as tissue biopsies for diagnosing wound infections?
Tissue biopsies remain the gold standard with approximately 90-95% accuracy, while properly performed swab cultures using the Levine technique achieve 70-80% correlation with biopsy results. Swabs are acceptable for most clinical situations given their practicality and lower cost, though biopsies are preferred for deep or complex infections.
How often should you repeat cultures in chronic wounds?
Only repeat cultures when clinical signs suggest a new or worsening infection, treatment fails after seven to ten days, or wound healing stalls unexpectedly. Routine weekly cultures of chronic wounds without infection indicators waste resources and can lead to treating colonization rather than infection.
Should you culture every wound you encounter?
No. Culture only wounds showing infection signs like increased pain, purulent drainage, expanding erythema, or systemic symptoms. Clean, healing wounds or those with superficial colonization alone do not require cultures.
What is the typical cost difference between swab cultures and tissue biopsies?
Swab cultures typically cost between $40-80, while tissue biopsies range from $150-400 depending on the facility and whether procedural sedation is needed. This cost differential makes swabs the preferred first-line diagnostic tool for most wound infections.
Healthcare facilities often implement protocols that guide when cultures are warranted based on wound assessment scores or specific clinical triggers. Following these institutional guidelines helps reduce unnecessary testing while catching infections that require targeted antimicrobial therapy. Some insurance plans require documentation of infection criteria before approving culture orders, so maintaining thorough clinical notes about wound appearance, drainage characteristics, and systemic symptoms supports reimbursement.
For home health or outpatient settings, consider laboratory turnaround times when planning culture collection. Most facilities provide preliminary results within 24-48 hours and final results with antibiotic sensitivities within three to five days. Timing the collection to align with provider availability for results review prevents delays in treatment adjustments. When cultures show unexpected organisms or resistance patterns, discussing results with infectious disease specialists or wound care experts helps optimize antibiotic selection beyond standard protocols.